IKEA Pax Hack
Constructing
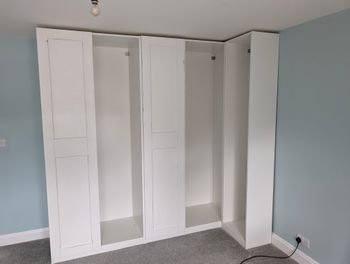
The first step is the easiest: construct the wardrobe shells according to the IKEA instructions.
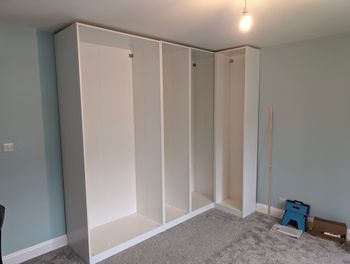
Then came the hard bit of working out exactly how to fill in the gap between the wardrobe and the ceiling as well as the wall. I bought various lengths of wood from Cheshire Mouldings, specifically:
- Square Corner Pine to sit on top of the wardrobe
- Double Rounded Cover Pine to wrap around the bottom of the wardrobe (only visible in the finished photo at the bottom of this page)
- Rounded One Edge Pine to join the wardrobe to the wall (only visible in the finished photo at the bottom of this page)
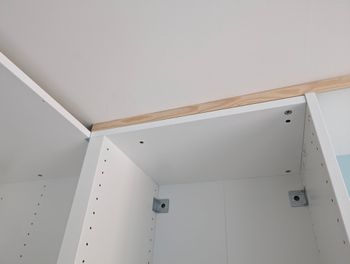
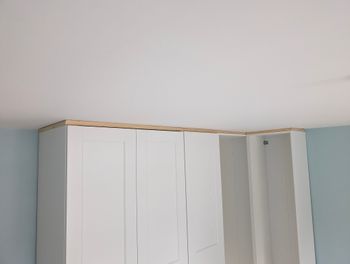
The wood was cut and shaped to fit the gap, then glued in place. The same was done with the wood along the bottom and to the sides of the wardrobe.
Preparing
This next step involves the preparation needed before painting; all 4 doors were sanded on the outside, the outwards-facing parts of the shell were sanded, and the bookshelf shelves were sanded.
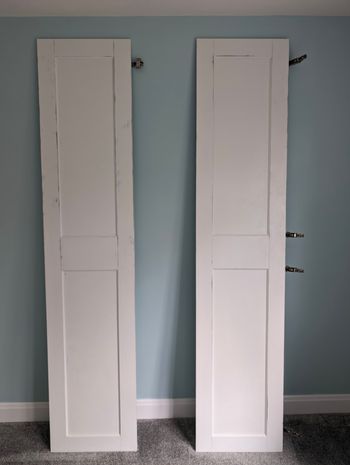
The bookshelf will only ever have 6 shelves in it, and set heights, so the dozens of additional holes were unnecessary and would detract from the overall look of the unit. Therefore, the holes that won't be used were filled with polyfil and then sanded:


The final bit that happened here (un-photoed) was going round the whole thing with caulk to smooth out all the rough edges.
Painting
And now to the most fun stage: painting.
The choice of primer was most important. A lot of others online suggest Zinsser ZINBIN500 B.I.N Primer/Sealer Stain Killer Paint so that is exactly what I used. If it is of use to anyone: you need 1L of that primer to do 2 coats of the size of wardrobe I have chosen along with all 4 doors and the 6 bookshelf shelves.
And now we add 3 layers (yes, 3! - I ordered too much paint) of Dulux Eggshell - Mint Macaroon to the primed surface.
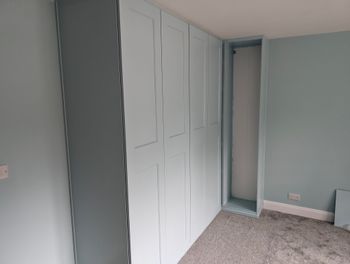
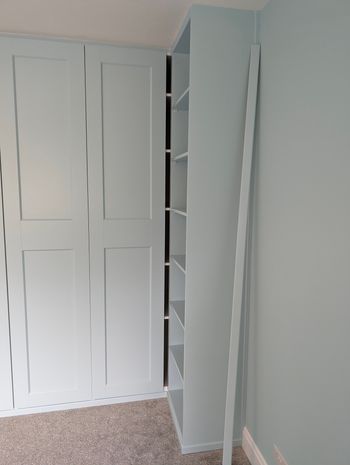
It is really starting to take shape now.
Finishing Steps
Some final touches are need to finish the project off.
I wanted to wallpaper the back of the bookshelves to add a little bit of interest and inject some different colours. I am very pleased with how this turned out:
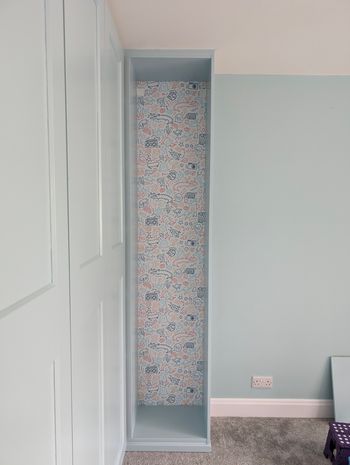
Something I didn't realise until near the end was that the door for the final shell doesn't fill the gap. IKEA expect there to be a door on the shell that I am using a bookshelf. So this needs to be filled. You can see the additional strip of wood to the right which I have added to the inside of the shell.
All Finished
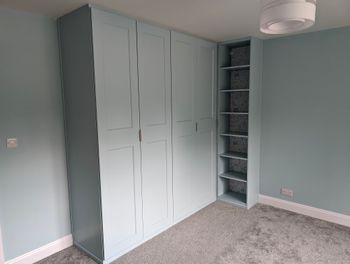
And there we have it. The finished wardrobe with built in bookshelf:

